You can set up limited access to your dropkit account for employees depending on the duties they perform. Limited access helps to flexibly share responsibility. For example, for employees who manage different areas, such as product search, inventory management and order management, as well as secure your business by limiting the holistic access of one person to all processes. It is possible to organize this through the Access Control section.
To set up limited access, your employee must register on the platform to their email. Next, you need to go to the Access Control section in your dropkit account, to which you want grant access. To add a user, click the Add button in the upper right corner. This will open the Grant Access box, where you specify the email address of the user you want to grant access to.
Note – the user must already have an account on dropkit. It’s enough just to sign up – no need to configure accounts etc. Instruct your employee to sign up and let you know their email. Once you give them access – they will be able to access your account from their Accounts dropdown.
Once you add a user via the Provide Access popup, it appears on the list:
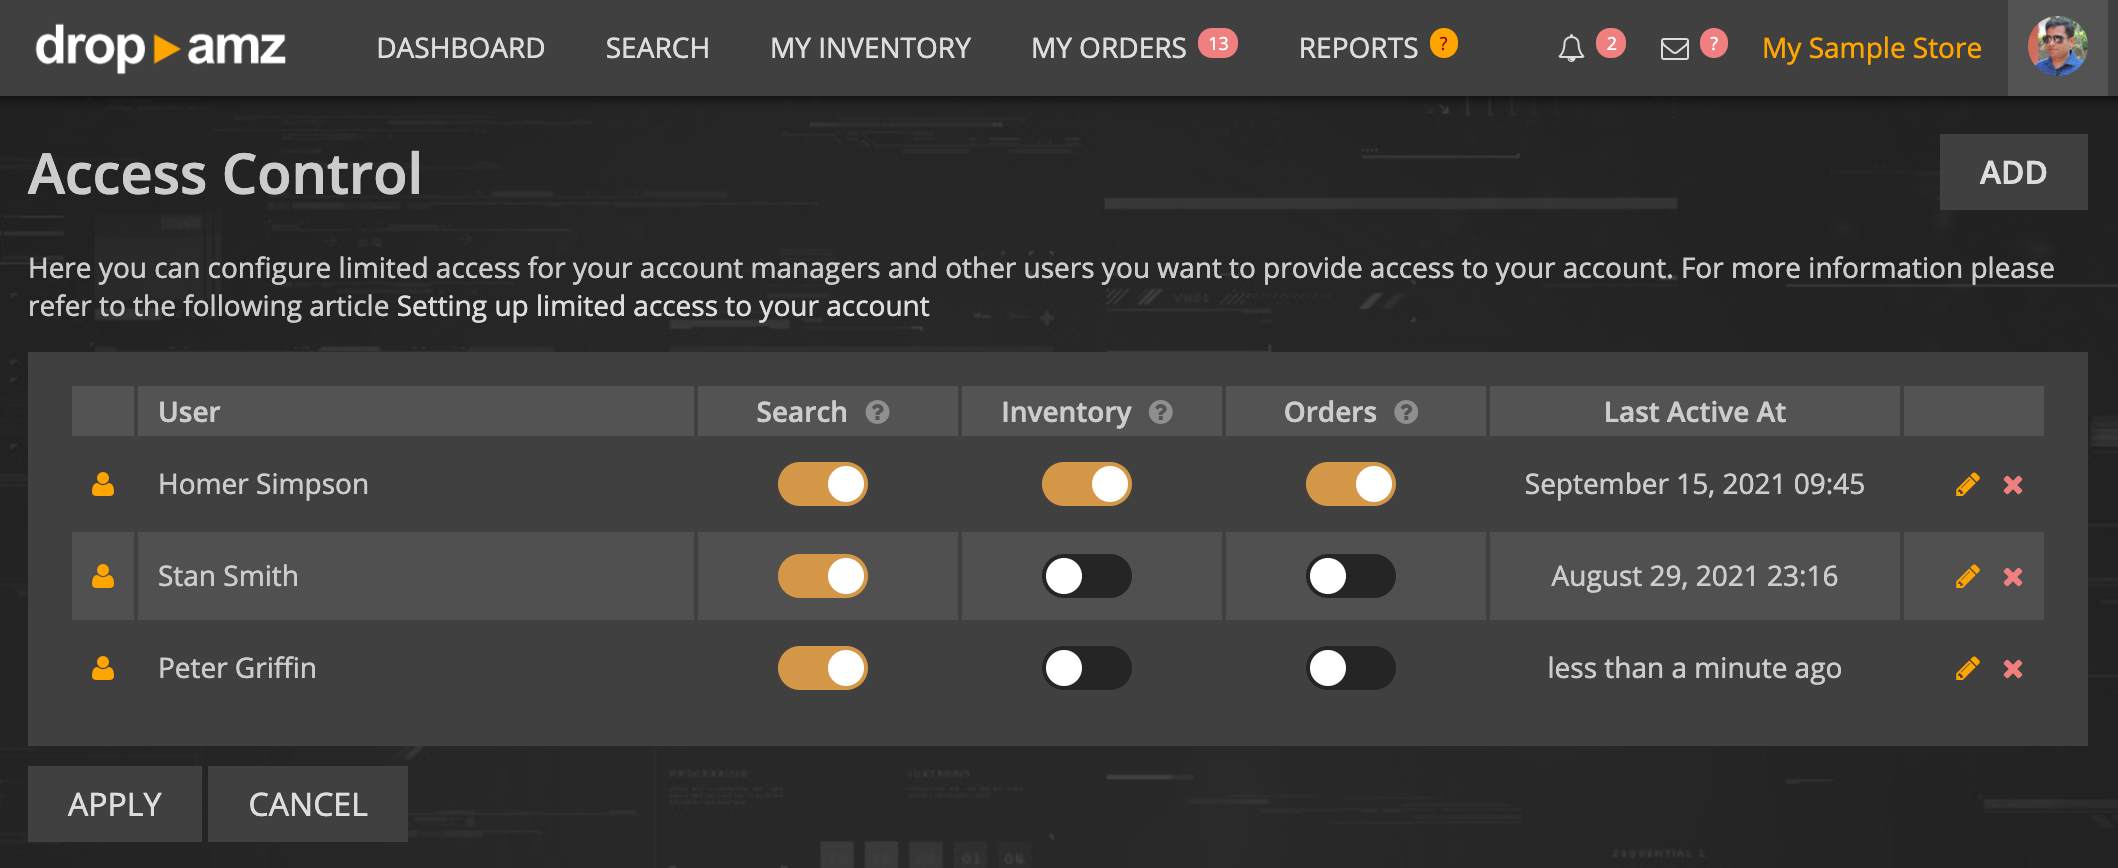
Right now there are 3 main permission areas you can share access to:
- Search – allows using Search tool and create inventory links – links are put In Review, and you can later accept or reject them from your account
- Inventory – complete management of your inventory (viewing, creating, editing, deleting bundles), without disclosing information about its sales
- Orders – gives full access to managing your orders – viewing, purchasing, canceling, refunding, retargeting, working with letters (access to customer letters in the Mailbox)
Each permission may be applied individually – eg. only allow manage orders without access to inventory, or only allow manage inventory without access to orders data, or only allow search without access to inventory or orders etc.
Also, for each user to whom you grant access, you can specify additional individual settings depending on the functions performed. To do this, in the line of the corresponding user, click on the “pencil” – then a window with Additional settings pops up:
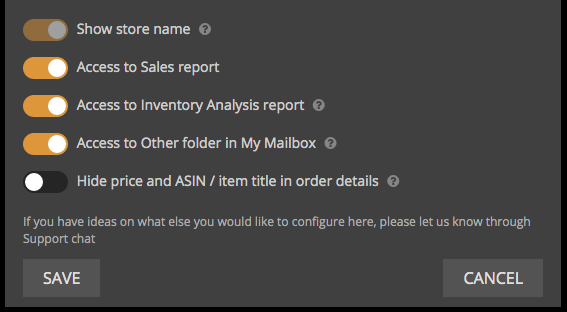
- Show store name – if you disable this option, the manager will see just your name instead of the store name. Thus, you can hide the store name (available only for managers with access exclusively to Search, since when working with orders and inventory, this information cannot be hidden by its nature)
- Accessing the Sales report
- Access to Inventory Analysis report – available only for managers with simultaneous access to Inventory and Orders
- Access to Others folder in the Mailbox – available only for managers with access to Orders
- Hide sales price and ASIN / product name in orders – available only for managers with access to Orders. This option allows you to give access to process your orders without disclosing any information regarding your store, ASIN and the listing itself. Thus, the manager will only see your internal SKU of the product, the buyer’s address and the quantity in the order. This option is ideal for granting account access to your supplier for order processing, or to a low-trust order manager.
Don’t forget to hit Apply after you made the adjustments!
User view
Once the user receives any permission on your account, their Accounts dropdown on the top right receives another line with your store name and small green lock icon. Clicking this line switches user to your account with limited access just as you configured:
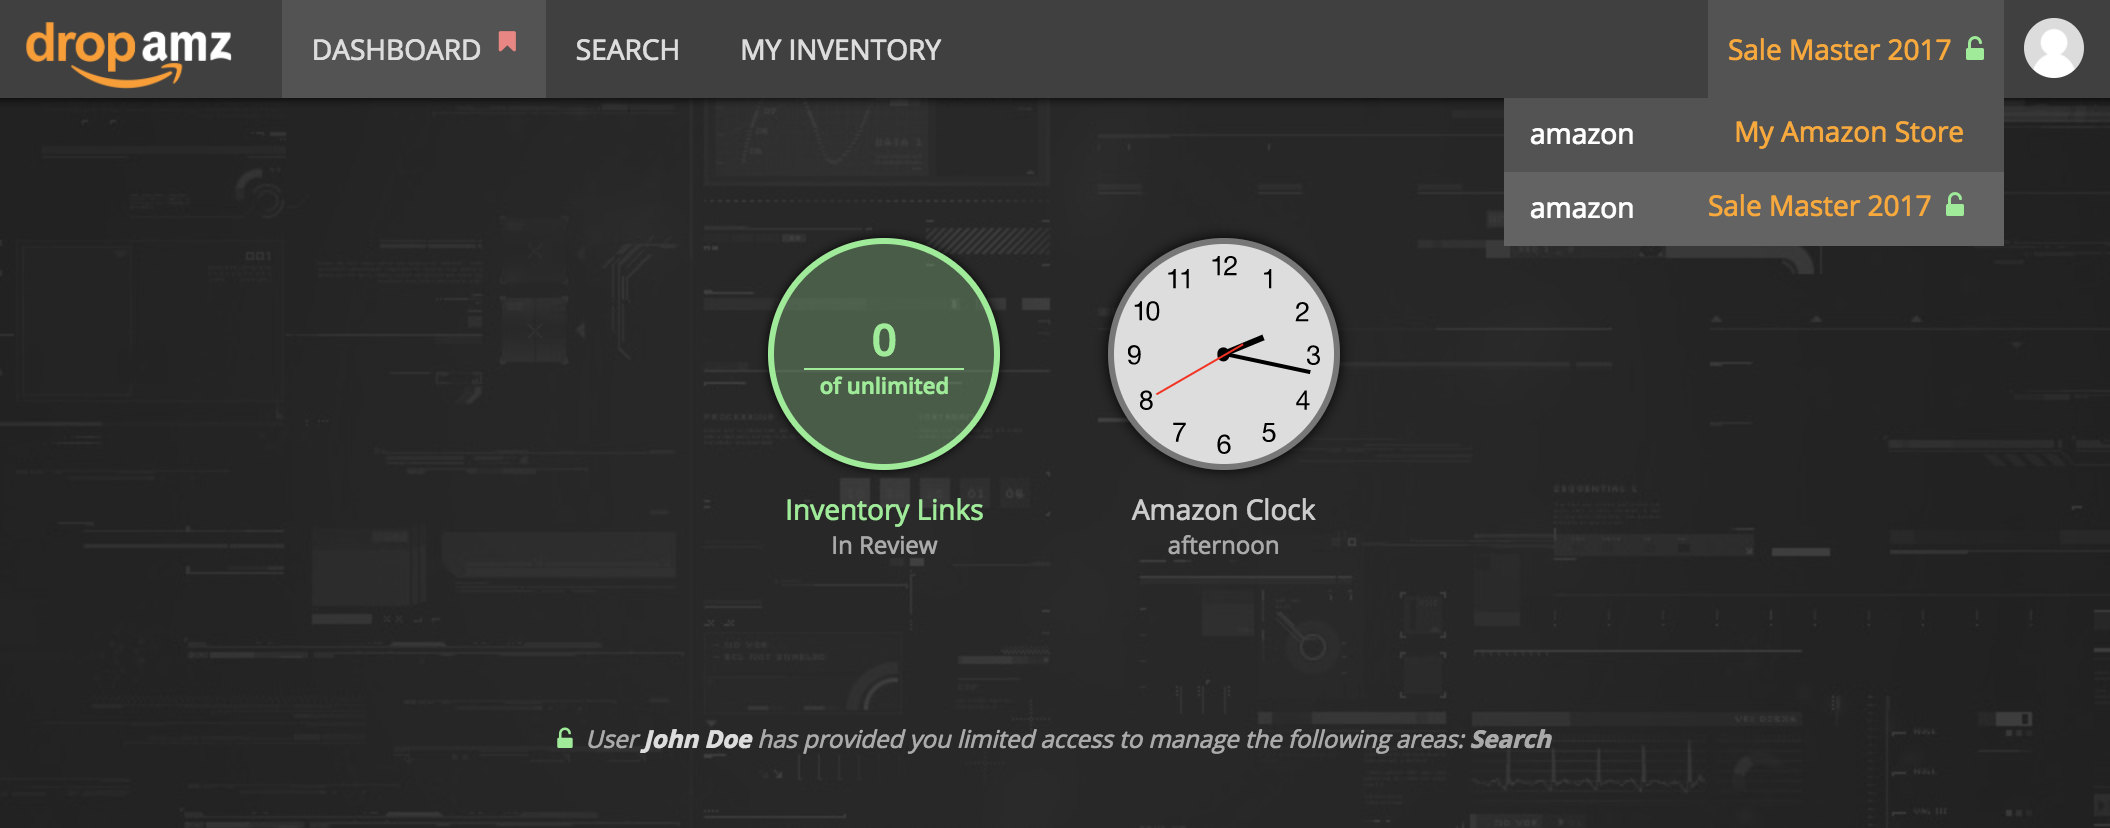
In this case the user was given access to “Sale Master 2017” store by John Doe with the only permission to search and submit inventory links for review.
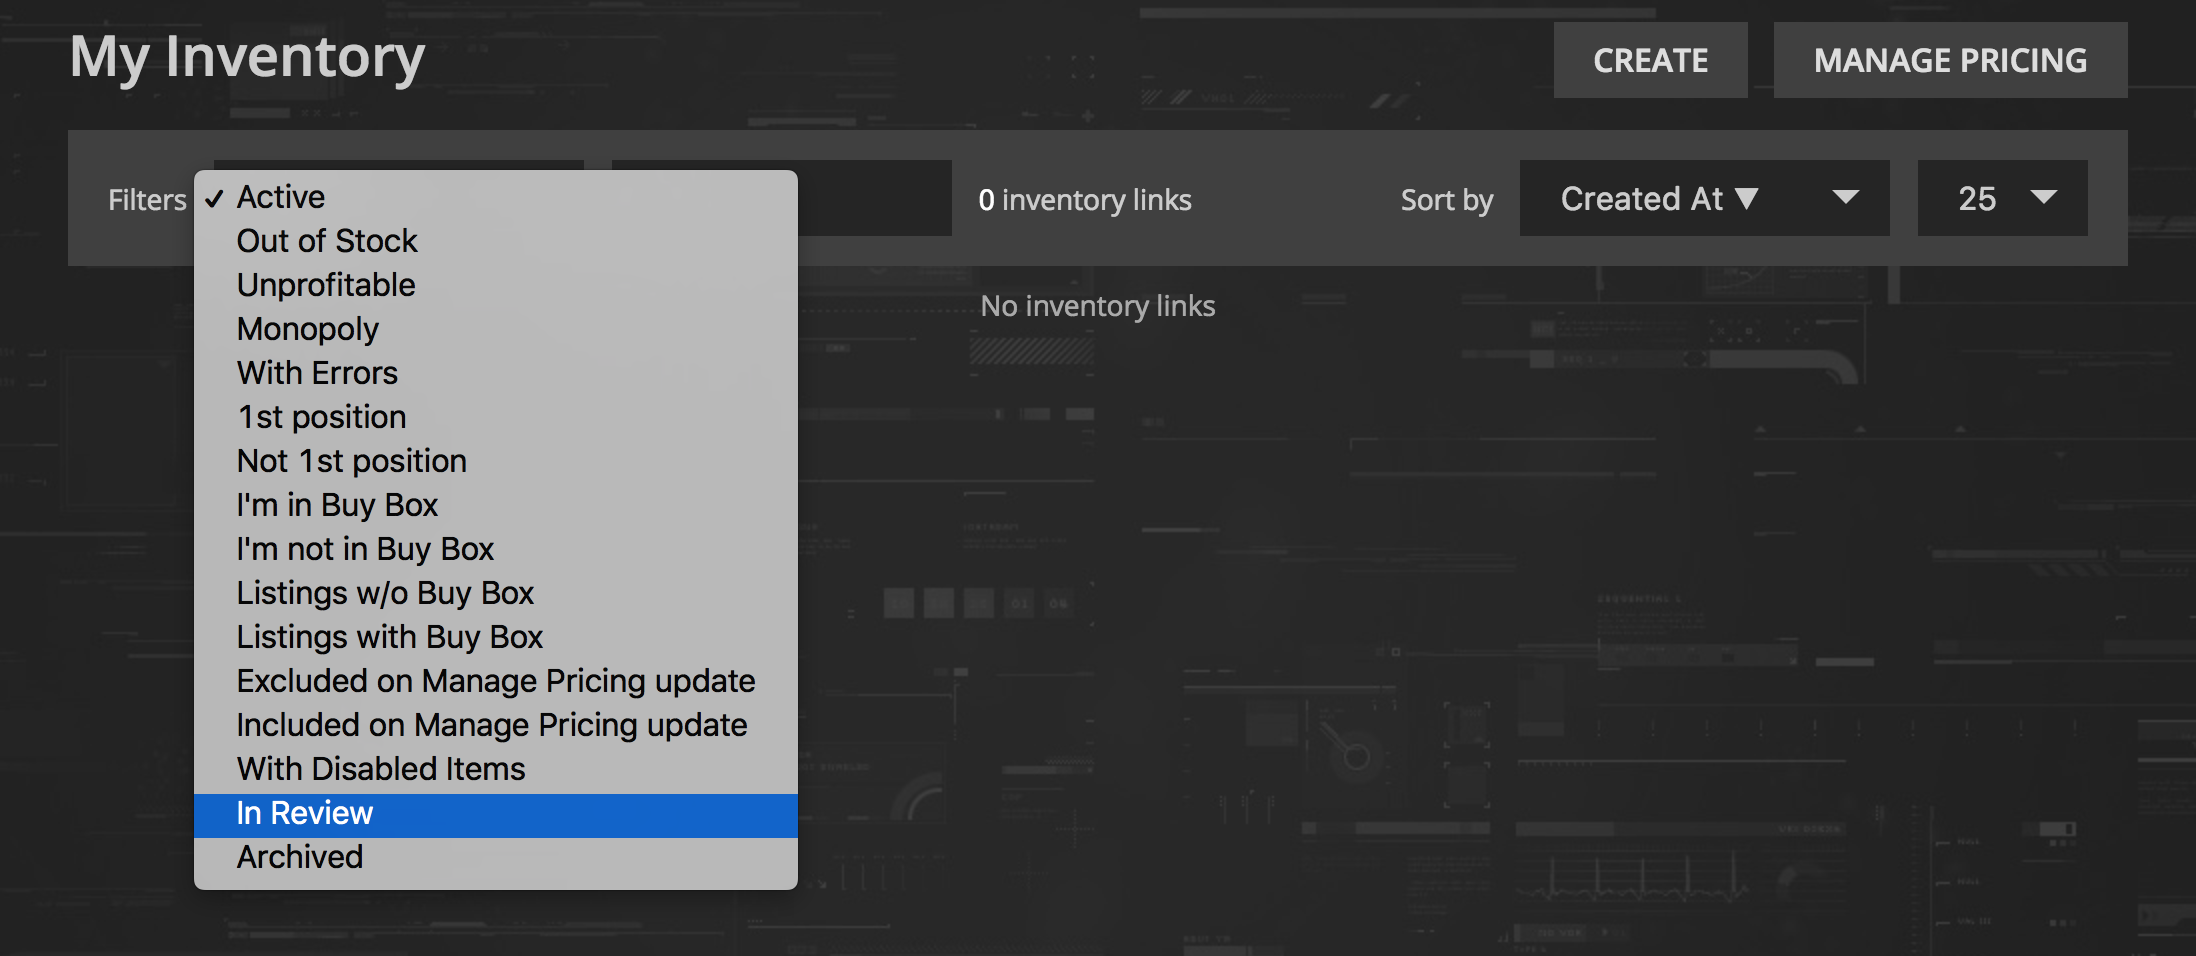
Inventory In Review
If you only provide your employee a Search permission, they cannot publish inventory links – all inventory links are submitted for you to review. You can accept or reject the link. To access links in review – choose In Review from filters dropdown on My Inventory: